Friday, October 31, 2014

Team Cruisin' Conquerors - Week #2

Throughout this week, we decided to finalize our bench design in illustrator. Each of us was responsible for at least one stencil that would be repeated at least twice in the design.


Above are the designs that we worked individually in illustrator for our bench


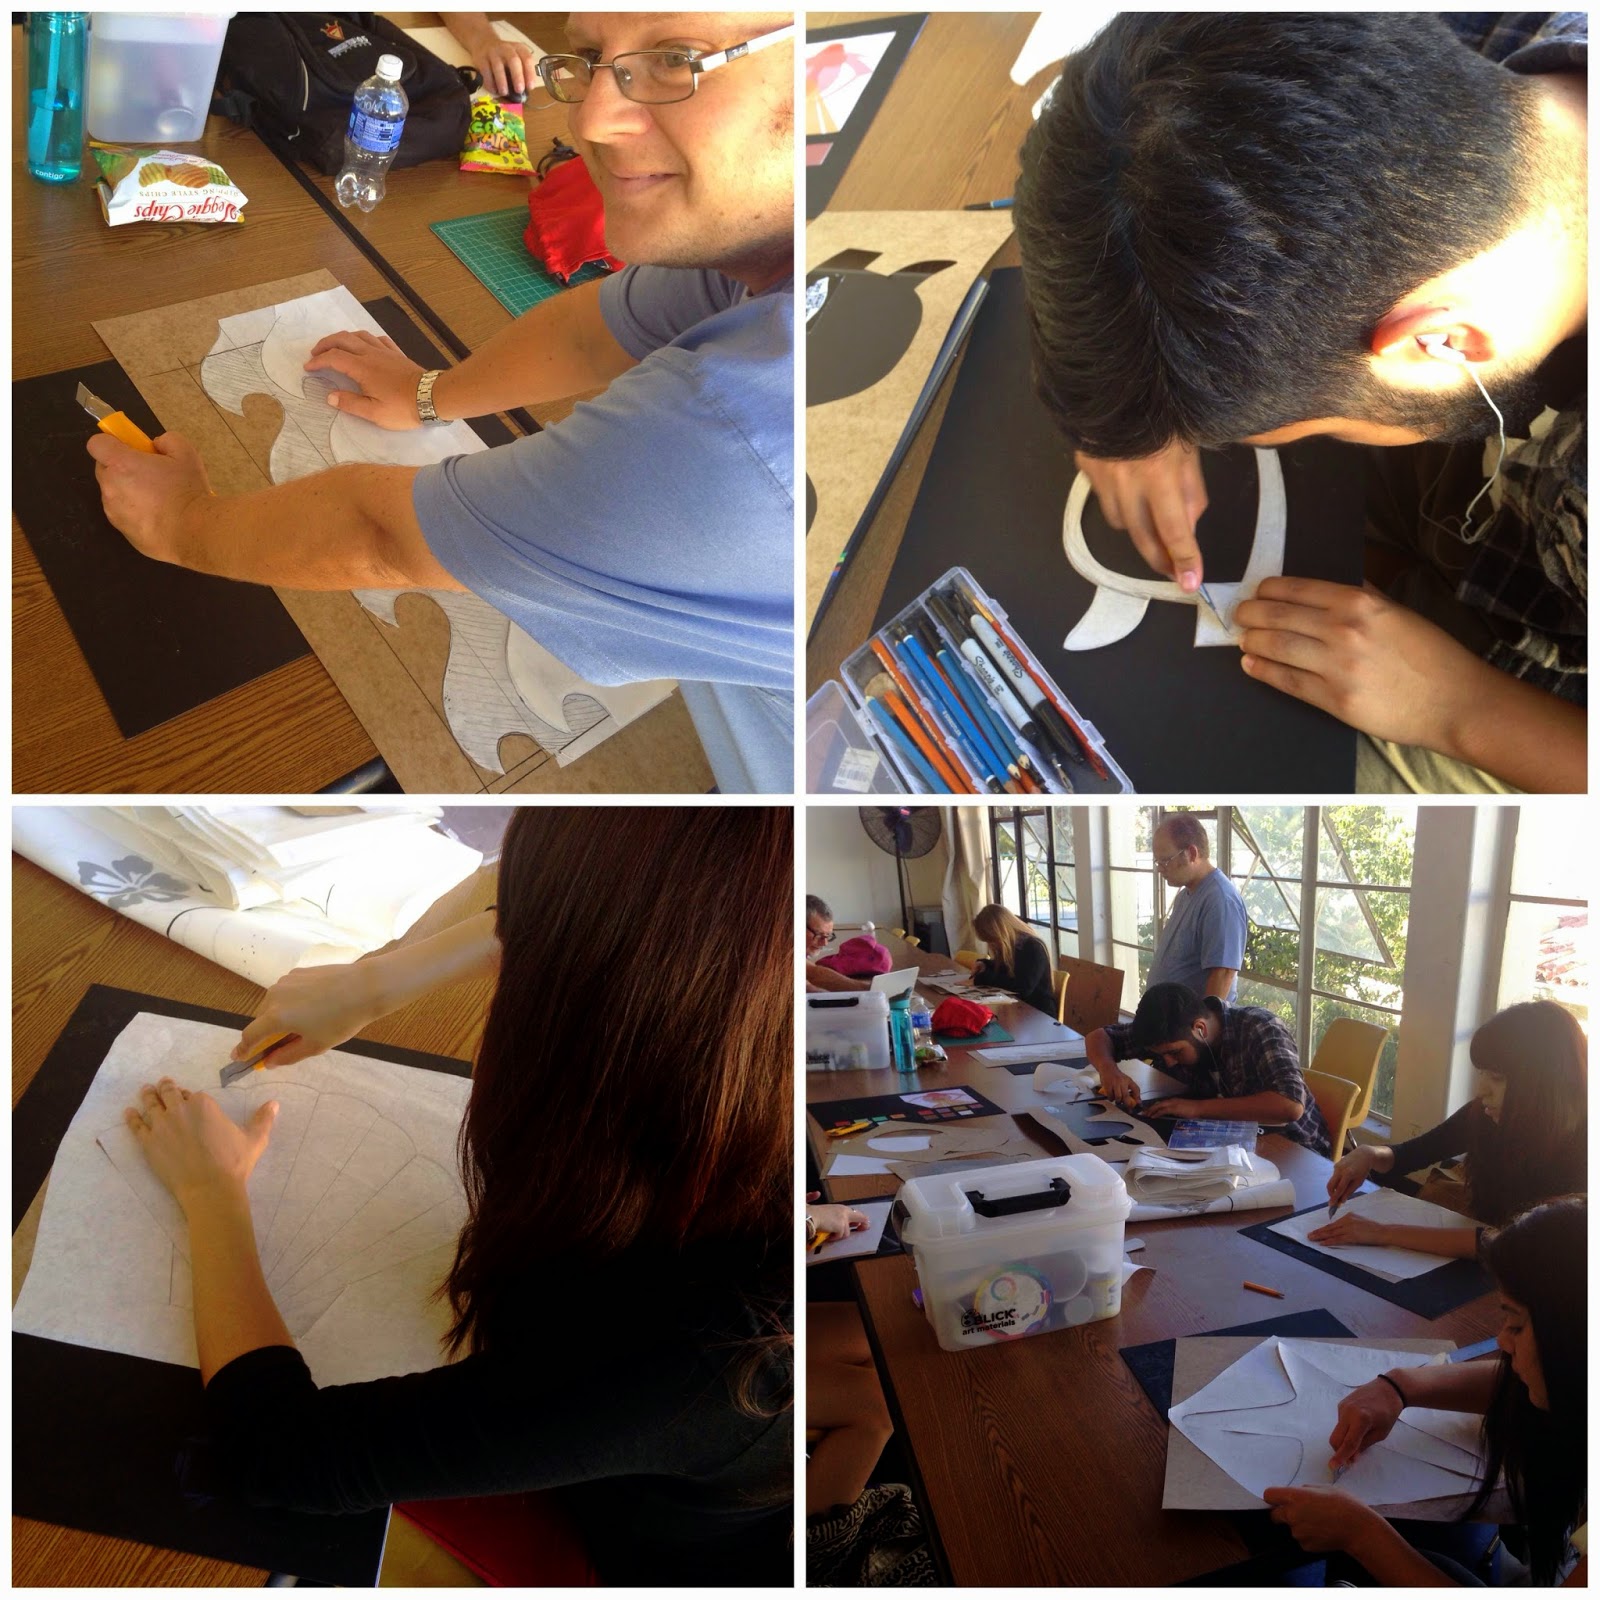
In order to create the stencils, we must first scale the designs accurately, so that when we print them out, they would fit the bench perfectly. Afterward, we carefully cut those stencils out from oil board.

For this week, our struggles were cutting and scaling the designs. Nevertheless, as working as a team, we were be able to get through that. For example, with Kiana's and Joseph's calculations , we were be able to get the accurate measurements for the stencils. Also, one of the designs that was difficult to cut was the turtle because of its details. However, Vanessa did a good job at cutting it, it turned out really nice and super clean!


                                                   Vanessa and Kiana are creating the stencils

At the end of this week, we created a list of colors for our bench and we also planed to test out the colors next week.


Posted by Ngan Dao


Team Big Mouth - Week #2


Going onto Week #2 for our bench project, we all began working on our stencils using oil board that we are eventually going to use for the shapes of the teeth and leaves that will be on our bench. We all individually worked on cutting out the different shapes of the teeth; after cutting out the teeth we all went out to look around campus for different shapes of leaves that we could make into stencils for the background of our bench. After finishing up the stencils, we began to help Tyler start the final design of our bench on illustrator and photoshop for our presentation to the board of directors of Arts Alive SDSU.
- Emma Erkelens

Thursday, October 30, 2014

Team 8-Bit - Week #2

Finding a Starman

Prints to create our stencils are placed where we've planned to have them

For this week, we scaled and printed out the images of the heroic plumber and his buddies in order to create the stencils. We focused on the placement of the images to create the world of Mario. Assigning these images to an appropriate portion/area of the bench was the key as we focused to make a world that people could recognize.


Then, in Illustrator, we created the design that would later be used as a template for our bench and implemented the design on a photo to better visualize what it may look like once we've finished painting.

On to the underground level!

Posted by Christopher Tucay

Team Golden Afternoon - Week #2

Project Template
 During week 2 of the creation of our bench, we began implementation of design. We used the magic of illustrator to create a digital image of what we hope our final product would look like once it was complete. This template of our bench is incredibly helpful because it allows us to have a clear and cohesive image to further fine-tune the logistics of what our final product will look like.
Stencil Creations
Through out the week, each group member made a few stencils each. We ended up with approximately 20 stencils total, which we plan on mixing and matching with an assortment of colors. This will ensure that we achieve as many unique hexagons as possible while allowing each team member to have a voice within the bench. After cutting the stencils on oil-boards, we began experimentation.

The Process

Shown above is one of the few methods that we plan on using to create flowers. This flower is one of the more abstract designs, created by spraying the stencil, and then rotating the stencil to create more petals. We also plan on layering different stencil designs, adding multiple colors, and adding other elements to each flower.

We plan on allowing the painting process on the day of to be semi-improv so that once the hexagon templates are created, each flower will be designed and created using the stencils and colors available.
                                                                                                    Lillian Dissi

Team Spray Art - Week #2


     On the first day of the second week working on our bench project, we concentrated on drawing out and cutting our stencils, which we would use to create the shapes on the bench.  It took us a couple of tries to get the right look, and to figure out which shapes complimented each other the best, but eventually we chose four different, very simple, and non objective shapes that worked very well together. 
     On the second day of the second week, we experimented with spray paint and used our cut out stencils to practice on big sheets of paper to try and get an idea of how the layout of all of the shapes would look, and to see how we would use the space that the bench gave us. The most complicated part of the stencils was trying to figure out how the spray paint can stencil would fit onto the bench because we made it a bit too large and we needed to improvise and cut some pieces shorter so that it fit on the bench. We also made a list of the colors we wanted for our bench design, and we prepared for the presentation the following Wednesday.

(Above) Ian Mckelvey sketches a design that will be used on the bench. Mija Pritchard cuts out shapes to make a template that will be used for practicing with spray paint and placement.


A recap of some of the highlights from this week.

-Kate Agnoli

Monday, October 27, 2014

Team Beach Bums - Week #2

Upon commencing our second week of bench projects, our group has accomplished many tasks.
We discussed and finalized our design on our butcher paper draft and divided up the work so each group member would be assigned to one design element of the bench. With the assistance of Mister Fobes, we examined how each stencil should be cut and placed on the bench to optimize its space and its visual appeal. 

After finishing our stencils, we took them down to the paint area and created test samples of each stencil using spray cans to help us visualize what the colored products would look like. It was a fun experience since some of our members have never spray painted before! We then photographed the test samples.

Our last task was to create a bench presentation drawing on Illustrator. It included a 2-dimensional and 3-dimensional design using a real life photo of the benches as a template. The 15x20 scaled down drawing is a professional approach to how the final bench project will look and will assist us when we present the posters to the Arts Alive committee on Wednesday, October 29.

Our team is very excited to work more on this project and we can't wait to officially start painting!

Team members Jackie Nacalaban and Karissa Rhoads create final outline of bench design on butcher paper (Top Left and Right)
Karissa and Ricky discuss how to transfer the design to Illustrator and how it will be created (Bottom Left)
Final stencils that will be used on the pained bench are cut out and layed out (Bottom Right)

Nathan Henrichon (Top Left),  Ricky Lopez (Top Right), and Lisel Soria (Bottom Left) cut out their individual final designs for the stencils that will be used to paint on the bench

Sara Sandoval (Top Left) works on her starfish design
Ricky looking stylish with his rad shades (Top Right)
Everyone is working really hard to get their stencils completed
Posted by Jacqlyn Nacalaban

Friday, October 24, 2014

Team Cruisin' Conquerors - Week #1


Hi! Welcome to our bench blog!


Our group's theme is Aztecs meet San Diego.
We wanted the upper portion of the bench to represent Aztecs by creating traditional, angular shapes and warm colors. We also wanted to make this part of the bench not as bold as the bottom. Therefore, we all experimented with various line usage to discover best possible solution in which a center of focus is created without distracting from the other part of the bench. However, we struggled with how to make the top lines “thinner” than the bottom, but also stand out so people can see it. Finally we ended up with a single line with the turtle's patterns. In this way, by looking from a far distance, it will not only stand out, but at the same time it won’t be as “thick” as the bottom part. In addition,  reusing the turtle template as fill for the top lines creates harmony among the separate pieces.


The lower portion of the bench will represent the beach by using cool colors. For this part, we decided to apply what we learned about colors from previous weeks on our design.Our group, therefore, will place the turtles on top of the surfboards in order to create the illusion of one color is overlapping and transparent to the one below.

This is a great opportunity for us to experience what we learned in class and apply it to a real world project, and we can’t wait to see our group's, as well as other groups’, amazing finished benches on campus.


Posted by Ngan Dao
Edited by Kiana Moy


Team 8-Bit - Week #1

Team 8-Bit Presents "Mario Wonderland"

Welcome to Team 8-Bit's blog! This blog will be documenting the 5 week process of designing and spray-painting our bench near Hepner Hall at San Diego State University.

Week #1 - Finding the 1-UP Mushroom
Team 8-Bit sketching out a design after brainstorming.
As a group, we decided to do a design that revolved around old-school video games such as Super Mario Bros., Sonic the Hedgehog and Megaman but soon realized that it was a bit of a mess. While sticking to the old-school theme, it then evolved into a singular topic of Super Mario from the NES catering to childhood memories/nostalgia.


This is where we began working, trying to figure out the scale of which we can emphasize our idea and possibly replicate the world of Super Mario. Finding the size of Mario would determine the size of our other shapes.

Rough draft of the scale we will be using.
It began to evolve as we added more characters and pieces so that we can emulate the feeling as someone were playing as they sit and watch the game unfold.


And thus we became, Team 8-Bit.

Posted by Nicholas John Howard
Edited by Christopher Tucay

Team Beach Bums - Week #1

This is our design outline we drew placed on a bench.

Our group was discussing the idea of whether we would want the students to look at this bench as something they can put themselves in or a picture that they would be looking at. And we also wanted to come up with an idea that related to the school and the area that we live in, "Sunny San Diego" so we came up with a beach theme. We came up with the idea of laying 3 towels as if it looked like they were hanging over a bench along with items that are found at the beach or items that you would take with you. 
Here are some details of the bench design.

Posted by: Lisel Soria

Wednesday, October 22, 2014

Team No Limits - Week #1

Welcome to the blog for Team No Limits! In this blog, we will post a weekly update that shows how the bench project is progressing. Our group is called "No Limits" because it was fitting name for the space theme, but also it ties-in with how we are on a college campus, and how there are basically no limits to our education and what we can achieve in our time here.

Team No Limits with the finished bench
From left to right: Lexi, Haley, Marguerite, and Nick

For our design, we wanted to do something that very graphically represented space and the universe. We wanted to do something that would slightly resemble a comic book. While we were brainstorming ideas, we started looking at Roy Lichtenstein paintings, and found one of a sun. We thought it was very interesting how he flattened the image with Benday dots (small dots commonly used in comic books that give the illusion of solid color through a pattern).


We thought something like this would be very easy to make stencils for. We decided our composition would be dominated by a sun and its large rays. After many preliminary sketches, we finally decided on an arrangement where the sun would be in one corner, and be balanced by a large planet at the other end.


We added some rough ideas of adding a few more planets, some stars, a moon and a space ship to add some depth, and give more variety to our composition. We will add more fully realized images of these in our Adobe Illustrator studies in posts to come.
These are some original concept sketches for the spaceship and overall bench design:

Original sketches by Nick


- Marguerite Davidson

Team Golden Afternoon- Week #1


Our group has been brainstorming designs all week long. We've come up with the idea to create a grid of hexagons consisting of different colors. On top of each hexagon we will stencil on a flower. Each group member will create two or more designs for the stencils, generating a collaborative design. We will use a variety of bright colors to spray paint the stencils in different arrangements to create depth and variety. We hope to produce a truly unique and spectacular bench, a place where students can stop to smells the flowers.
-Drew Bonwood

Team Spray Art - Week #1

After many creative design proposals from our team we decided to draw inspiration from the medium we will be using. Our final design explores line quality and color interaction with the image of a spray paint can producing colorful, dynamic shapes spread across both the vertical and horizontal faces of our bench. We thought it was important in the design process to use our bold colors in contrast with black and grey line work as an homage to late 1950's Pop art including the iconic style of Roy Lichtenstein.
Ian Mckelvey creating one of the initial drafts for our design
-Mija Pritchard

Monday, October 20, 2014

Team Big Mouth - Week #1


This past week our team has been plotting out ideas and sketching what we think would look the best on our bench.  After hours of collaboration and rough sketches, we came to the conclusion that we are going to be painting a huge smiling mouth.  This idea will not only be very different from any other bench on campus, but hopefully can seeing the smiling bench, will also draw smiles from everyone that sees it!  Here is a little taste of what we have been doing in the first week.
- Hannah Dodge

Welcome to the Art Bench SDSU blogsite


Two classes of Design 1 (art 101) make up the seven teams that will be working on the project. Updates to each teams activities will be about every week from October 13th through November 15th.

The Art Bench project is an event of Arts Alive SDSU, which is part of the larger creative and research component of University strategic plan "Building on Success." The first development of the art benches were implemented by professor Patricia Cue in her Environmental graphics class as part of the Graphic Design program in Spring 2014.

As the instructor for the foundations course Design 1, I have taken on the project with my class for the Fall 2014 semester. Eight historic WPA benches from the late 1930's have been selected for the project. The benches have been restored by plant facilities to near original condition. Our job is to create interactive compelling visual art on these historic benches in the original historic core of campus.

Please feel free to visit the campus anytime to watch the progress and to enjoy the benches when they are finished.

David Fobes
Lecturer in foundations
School of Art + Design. SDSU

one of the WPA era benches we will be painting.